
Common causes of a failed 3D print, and how to fix them
3D printing problems often fall into three categories: improper bed adhesion, filament issues, and printer settings. Read more about them below.
Diagnosing and fixing improper bed adhesion
The first layer of filament that goes onto the build plate is the most crucial part of your print, the foundation on which the rest of your model is built.
While you don’t have to supervise your print from beginning to end, we recommend you always watch the first few minutes to make sure your first layer adheres to the build plate without issue.
Improper bed adhesion can cause:
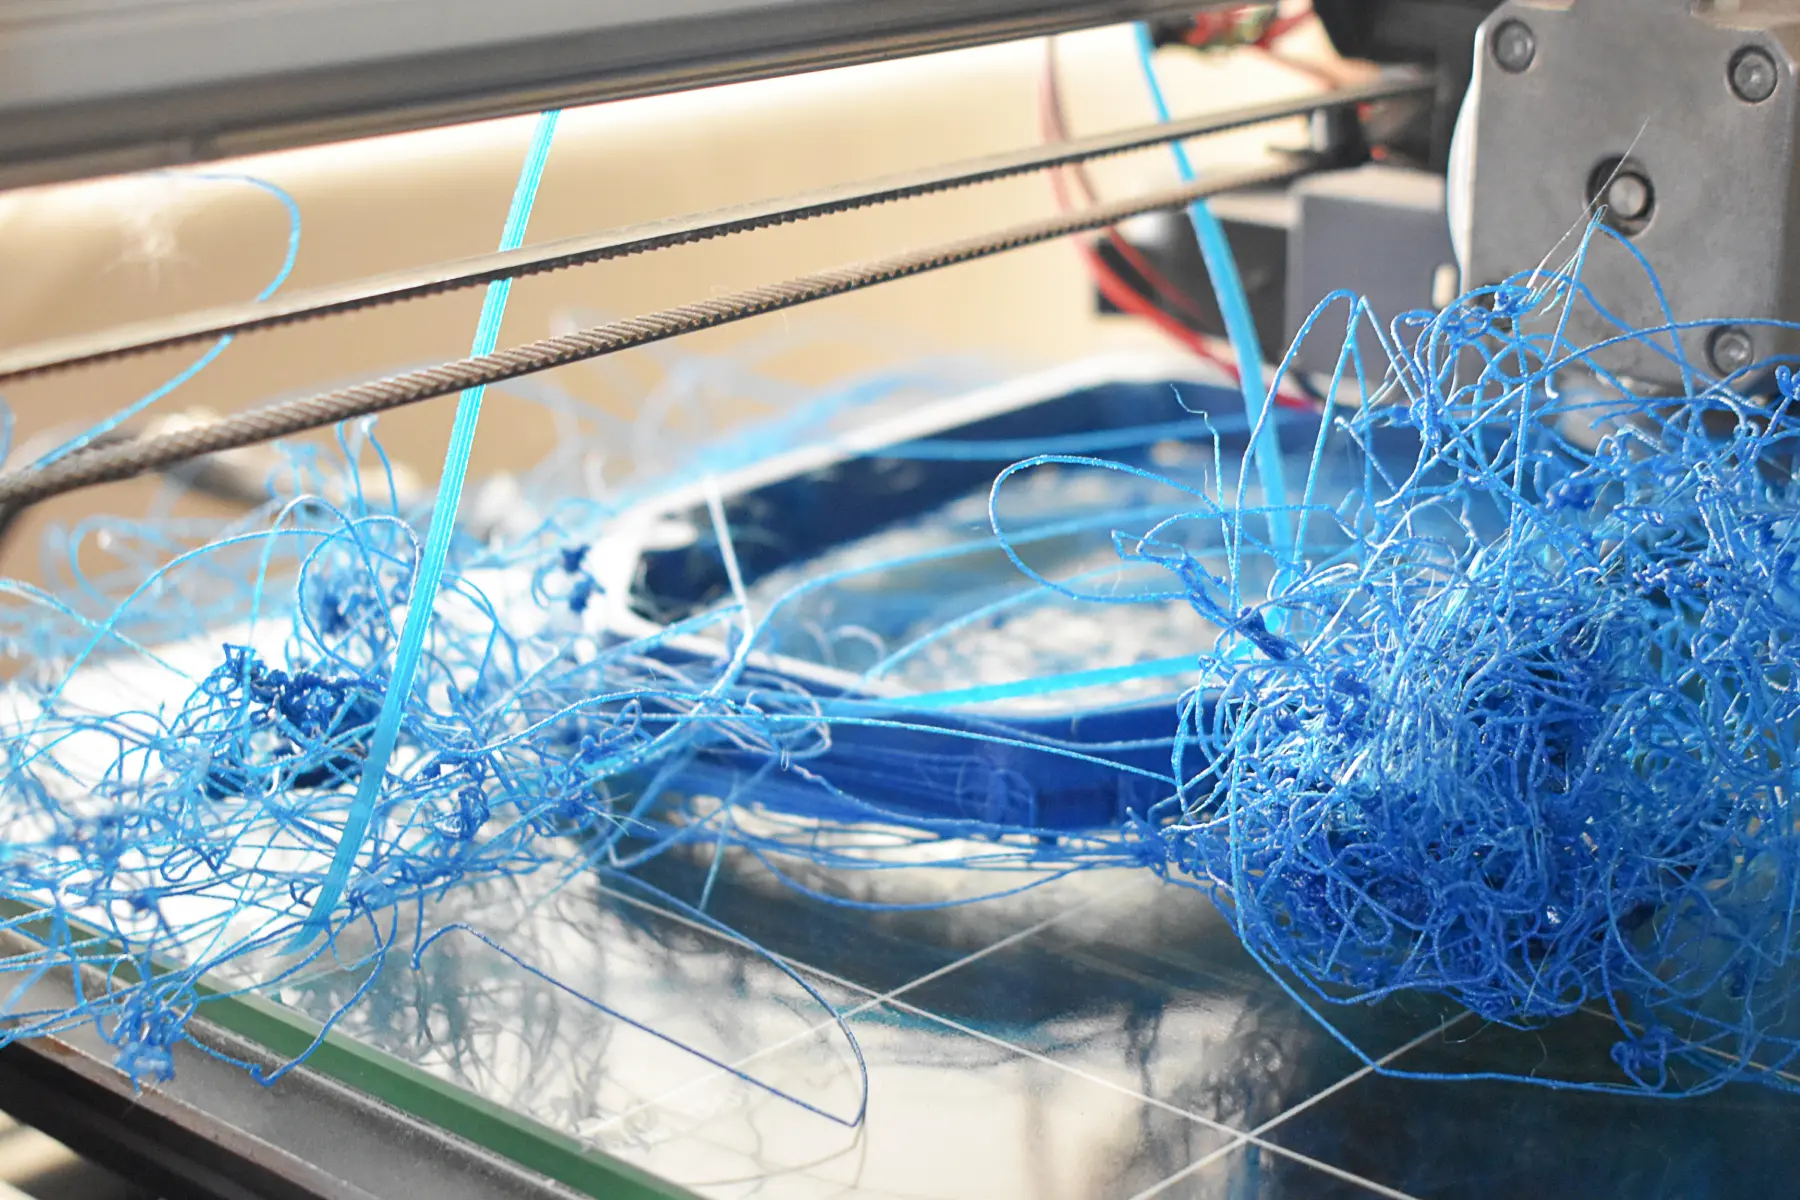
- Spaghetti. The model may become detached from the bed completely, but the filament will continue to extrude without any layers to attach to, causing the infamous pile of spaghetti.
- Curling or warping. The edges of your print may begin to curl upward, also known as warping.
- Shifting. Your print may appear to adhere at first, but vibrations from the printer can detach the first layer, causing the model to shift mid-print. If your model is able to keep printing without turning to spaghetti, it might turn out distorted or warped because the layers aren’t aligned where they have to be.
Let’s get into some of the most common causes of bed adhesion issues, and how you can fix them.
Dirty build plate
Touching the build plate can leave fingerprints and oils, which will lead to adhesion issues over time.
Solution: Clean your build plate with warm water and dish soap, dry thoroughly, and avoid touching the middle of the printing surface.
Wrong bed temperature
If the bed temperature is too low, the filament can have trouble sticking. Different materials may need a higher temperature.
Solution: Check your filament manufacturer’s recommendations and adjust your heatbed settings in your slicer software.
Improper nozzle height
The nozzle can’t be too far or too close to the build plate. If the filament looks thin and your first layer has gaps, it may be too high. If the filament looks squished or the nozzle touches the bed, it’s too low. This is closely related to leveling, but as you’ll see in the next section, adjusting an unleveled bed usually requires you to move the bed, not the nozzle height.
Solution: Adjust your Z-offset accordingly to move the nozzle slightly higher or lower depending on what your failed print looked like, and try again.
Unleveled bed
The nozzle needs to be the same distance across the printing surface. If it’s not consistent, the first layer may not adhere to the parts that are farther away from the nozzle. You’ll see that some parts are sticking, and some aren’t.
Solution: Use the printer’s auto bed leveling function, or level the bed manually. A good way to do this is with a sheet of printer paper. Place the paper between the nozzle and bed and move the nozzle around to different sections, adjusting the bed at each point so the nozzle meets the sheet of paper at the same resistance.
Small print surface
Large, flat surfaces adhere better than small ones. If your model is a small figurine with feet, for instance, that may not adhere as well as a box with flat sides.
Solution: Add a brim to your model in your slicer software to provide more surface area for adhesion.
Diagnosing and fixing filament problems
3D printing issues often don’t have to do with the printer itself. If that’s the case, you could have a problem with your filament — the thermoplastic material that your printer heats and extrudes to form layers.
Filament can be made from different types of plastic, each of which has different properties. Some are more heat resistant and require higher temperatures to print. Filament must be stored properly, or else it could absorb moisture and cause problems when printing. We’ll get into some of those issues below.
Wet filament
Filaments can absorb moisture from the air; some materials, like nylon, are more prone to this than others. When wet filament gets heated up by the hot nozzle, the moisture in the plastic can start to steam or bubble, causing a popping or hissing noise. The filament won’t flow smoothly through the nozzle if this happens, causing bubbles, rough surfaces, or stringing on your model.
Solution: Dry the filament with a repurposed food dehydrator or special dryer box. Store it properly in an airtight container with desiccant packs to prevent it from happening again.
Cheap filament
As with many things, when it comes to filament, you get what you pay for. Cheap filament can be made with additives or with a lower level of quality that can cause issues with your print. A common problem is inconsistent filament diameter — some sections will be thinner, and some will be thicker, causing your nozzle to under- or over-extrude filament. You might see this as inconsistent walls, gaps, and bulging surfaces on your model.
Solution: Check out our filament guide for a rough estimate of filament cost. Try to avoid paying much less than the average cost for that type of filament.
Degraded filament
Filament that has been improperly stored and exposed to moisture or UV light can start to degrade, making it weaker and more brittle. It can even snap during the printing process, leading to incomplete prints.
Solution: If your filament has been left out for a while, test it by bending the tip. If it snaps, it might need to be replaced.
Tangled filament
If the loose end of filament gets crossed under another loop, it can get tangled. If this happens mid-print, it can prevent the filament from feeding into the extruder, resulting in an incomplete model.
Solution: If you notice the spool isn’t turning normally while printing, pause the print, remove the spool, and carefully unwind the tangle. Reload the filament, being careful not to cross the loops. Carefully secure the loose end of your filament onto the spool when it’s not in use to prevent tangles.
Diagnosing and fixing printer calibration and setting issues
Printer calibration issues usually refer to a problem between the slicer settings and the physical printing process. Every printer and filament may behave a little differently, which could require some fine-tuning of your settings. Here are some of the most common issues and adjustments you can make.
Uneven printer bed
We’ve gone over this in the bed adhesion section, but bed leveling is a common calibration issue. Successful prints require your printer nozzle to be exactly the same distance from all parts of the bed. If it’s not, your first layer may not adhere properly, or you might see that some parts of the first layer are thick and squished, while other parts are thin or gapped.
Solution: If your printer has auto bed leveling (a highly recommended feature when shopping for a 3D printer), run this setting to calibrate the bed level. If it doesn’t, level the bed manually by placing a sheet of paper between the nozzle and bed. Moving the nozzle to different sections, adjust the bed at each point using the sheet of paper to judge the distance.
Z-offset calibration
Your printer’s Z-offset controls the height of the nozzle in relation to the bed. If it’s too high, your first layer may not adhere to the bed properly. If it’s too low, the first layer could look squished or blobby. The Z-offset is usually set by your printer as part of the auto bed leveling feature, but you can adjust it in your slicer settings if you have to for individual prints. For example, if you’re using a thicker build plate or different filament, you might need to change the height of the nozzle to compensate.
Solution: If you’re seeing issues with your first layer that appear consistently across the layer, adjust the Z-offset setting in your slicer software depending on what you see. If the filament looks too round or has gaps between lines, lower the nozzle slightly. If the filament is too squished or the layer has rough, ridged lines (caused by the nozzle dragging through it), raise the height of the nozzle slightly.
Overextrusion
Overextrusion happens when the printer is extruding more filament than expected, due to too-high temperature or flow rate. This causes stringing, blobs, uneven walls, and thick or squished layers.
Solution: Lower the flow rate slightly and see if this helps. If it doesn’t, check your nozzle temperature and lower it a few degrees at a time until you get the right settings.
Underextrusion
With underextrusion, your printer is extruding less filament than expected. This can be caused by too-low temperature or flow rate, or a clog in the filament feeding system. It leads to gaps and thin walls that can weaken your model.
Solution: First, take a look at your printer’s AMS (automatic material system, if you have one) to make sure the filament is properly loaded. Check the PTFE tubes that guide the filament to the printer for wear, and the extruder gears to make sure they’re clean and properly gripping and pushing the filament through the nozzle. If all appears to be working, check your nozzle temperature and raise it a few degrees at a time until you get the right settings.
Retraction problems
Your printer’s nozzle should retract slightly when it needs to travel between different parts of the model without extruding filament. If it’s not calibrated properly, you’ll see thin strings or “hairs” of filament between these sections.
Solution: In your printer’s slicer settings, fine-tune the retraction length and speed. Longer retractions and lower speeds will help get rid of stringiness. Note that more flexible filaments, like TPU or nylon, require longer retractions because the filament will stretch more.
How to perform regular 3D printer maintenance
Regular 3D printer maintenance can help reduce some preventable printing failures, improve the quality of your prints, and keep your equipment running reliably for years. Take these steps every few months to clean and maintain your 3D printer (just make sure to do this when all the parts are cool).
- Clean your build plate. Remove and wash your build plate with warm water and dish soap (or your manufacturer’s recommended method) to remove dust, fingerprints, and filament residue.
- Inspect your nozzle. If it’s got filament buildup on the outside, wipe it off. If you’ve been having problems with clogs or inconsistent extrusion, purge the nozzle by heating it and manually feeding filament through it to push out debris. If it looks damaged or worn, it might be time to replace it.
- Clean the extruder gears. Use a small toothbrush or soft brush to clear away dust and debris.
- Check belts, pulleys, screws, and other moving parts. Inspect these components to see if anything is out of place or not secured. Don’t remove anything if you don’t feel comfortable disassembling your printer. Lubricate rails, rods, and screws according to your manufacturer’s recommendations.
3D printing troubleshooting FAQs
Help! My print looks “hairy” or has thin, threadlike strings on it.
Stringing can happen when the nozzle temperature is too high, your retraction settings aren’t fine-tuned, or your filament has absorbed too much moisture.
- If your filament is also popping or hissing when it comes out of the nozzle, and your model has little bubbles on it, it’s a moisture issue. Dry your filament before using it again, or try a different spool.
- Too-high temperature can also cause blobbing and thick layers. If you see these issues, lower your nozzle temperature.
- As a last step, check your retraction settings and try bumping up your retraction length slightly.
Why does my print look blobby?
This could be a sign of overextrusion, a nozzle temperature that’s too high, or retraction issues.
- If your model also has stringing, try lowering your nozzle temperature.
- If the blobs are mostly on the same side in a vertical line, this is likely a retraction issue related to your printer’s Z-seam setting (the point on your model where one layer ends and a new one begins). Try lengthening the retraction on the Z-seam setting if you can, or positioning the Z-seam at the back of your model to make it less noticeable.
- If your whole model looks blobby or too thick, it’s probably overextrusion. Lower the flow rate slightly to see if this helps.
My print looks like spaghetti. What did I do wrong?
Spaghetti failures happen when the nozzle keeps extruding filament after something has gone wrong with the print. The filament coming out of the nozzle has nothing to attach to, so it starts spewing into thin air.
- Check to see if your print has unsupported overhangs. If so, apply supports in your slicer software and try again.
- If the first layer has come off the build plate, go to our section on improper bed adhesion above to try to troubleshoot the cause.
- If the model is still attached to the build plate, that means something else went wrong. Look to see if any of your layers shifted or if your supports collapsed.
- If you find a gap in the model where filament stopped extruding, that could mean that you had an issue like a clogged nozzle.
Once you’ve pinpointed the problem, remove the failed print, correct the issue, and try again.
My print won’t stick. How can I get it to adhere to the bed?
Improper bed adhesion can be caused by a few things, like a dirty build plate or incorrect temperature. Here’s how you can fix the issue:
- Clean the build plate to remove dust, oils, and fingerprints.
- If only certain sections of the first layer are having trouble adhering, this could mean some parts of the bed are lower than others. Level the bed and try again.
- If the nozzle isn’t pressing the filament gently onto the build plate, or if it’s squashing the first layer too much, check the Z-offset.
- Make sure the bed temperature and nozzle temperature are set according to your filament manufacturer’s instructions. Preheat the bed if recommended.
- Slow down the first layer to give the filament more time to adhere.
- If your model doesn’t have a large, flat surface for its first layer, add a brim in your slicer to increase the surface area that will stick.
Why does my print look warped / Why are the corners of my print curling up?
As plastic cools, it contracts. Uneven cooling can cause your model to contract unevenly. When this happens, the corners of your print can warp, or lift and curl upward. Certain high-shrinkage materials like ABS are more prone to it, but it can happen with any filament.
Using an enclosure and the recommended bed temperature for your filament can help it cool more evenly and reduce the curling effect. Improper bed adhesion can make warping worse, so if you do find this happening, make sure your build plate is properly cleaned and leveled, add a brim in your slicer, and use the correct bed temperature.
Final thoughts
3D printing isn’t an exact science. Variations in printers, filament, and your environment can cause issues for even the most experienced makers, so don’t get discouraged. If you find yourself running into a problem, like spaghetti failure or stringing, address the root cause and try again.