
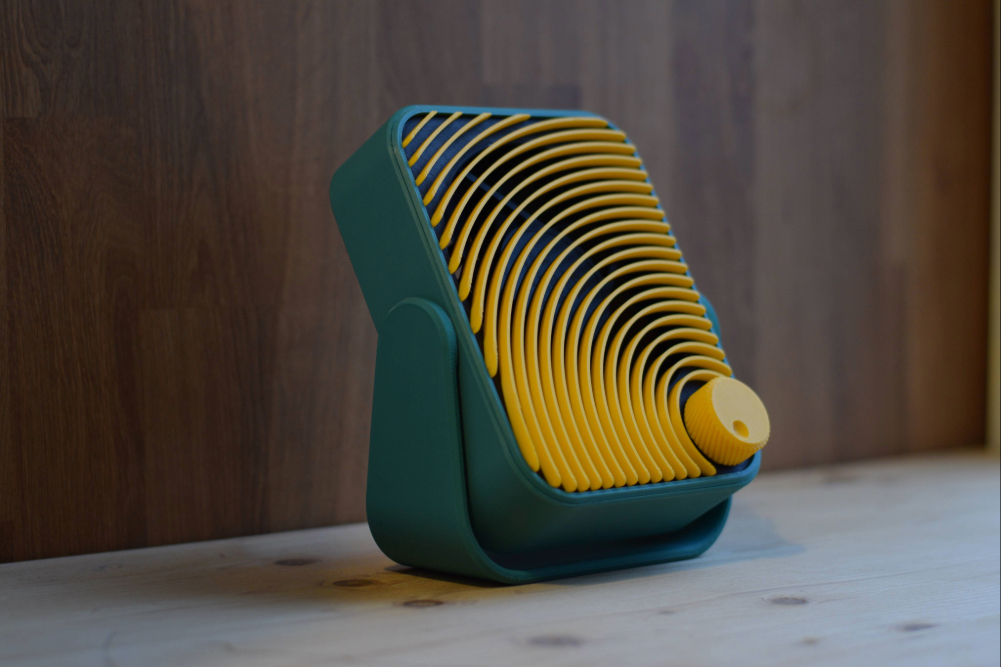
Designing around the part, not the other way round
Most 3D printing projects treat the printer as the entire factory: every part is printed, and the design bends around what a nozzle can do. But real products rarely work that way. They're housings built around components: a motor, a board, a bearing. That's the skill we wanted to practice with this model. Our goal is to take an off-the-shelf part, design a product around it, and make the printed geometry and the component feel like they were always meant to go together.
The part had to be something people actually have. A 120 mm PC case fan is the obvious choice as anyone who has ever built or upgraded a computer has at least one in a box. The dimensions of these fans are pretty standard: 120 × 25 mm, four mounting holes at 105 mm spacing, a 4-pin connector, so you can definitely find one lying around the house reorder it online.
There's a reuse angle, too. Case fans get retired for reasons that have nothing to do with wear, so rescuing one from a drawer and giving it a job just feels right.
Reuse alone gets you a hack: a fan zip-tied to a bracket. The second half of the brief was that this had to look like a real product. Function first, but make it a bit retro.
Parts list
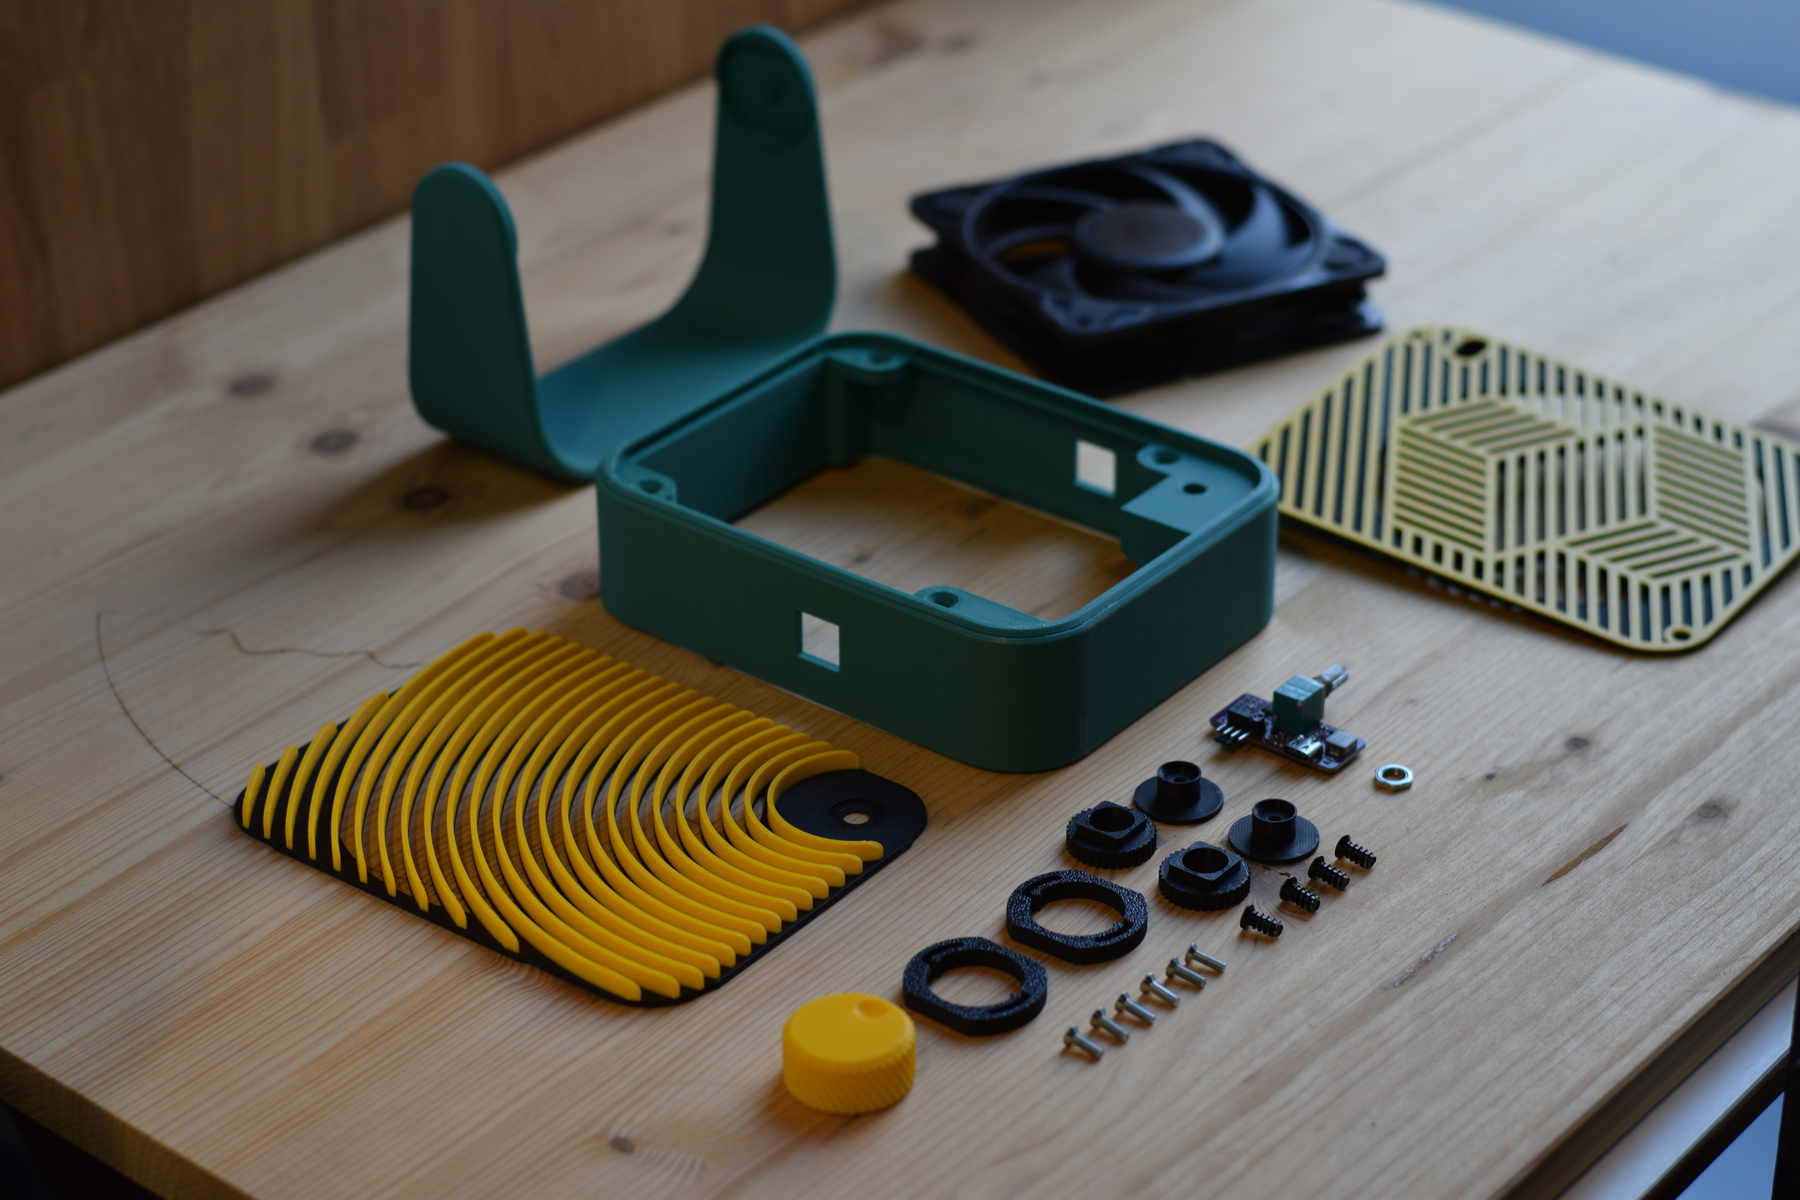
Printed parts
- Main body
- Leg
- 2× hinge endcaps
- Ribbed hinge cylinders
- Hinge springs
- Front cover
- Back cover
- Speed control knob
Hardware
- 1× 120 × 25 mm PC fan with 4-pin PWM connector (ships with 4 mounting screws)
- 1× USB-C PWM fan controller board, B-type, rear-facing USB-C port
- 6× M3 × 10 mm countersunk screws (2 for the hinge endcaps, 4 for the back cover)
That's the complete bill of materials. The fan's own screws hold the fan; the six M3 screws hold the housing together.
Choosing the fan
We used the Arctic P12 Pro LN. The LN stands for low noise: it runs between 450 and 2,000 rpm on a fluid dynamic bearing, draws barely over a watt at full speed, and comes with a six-year warranty. At the bottom of its range it's effectively inaudible on a desk. At the top it moves 83 m³/h, which is more than you'll ever want pointed at your face.
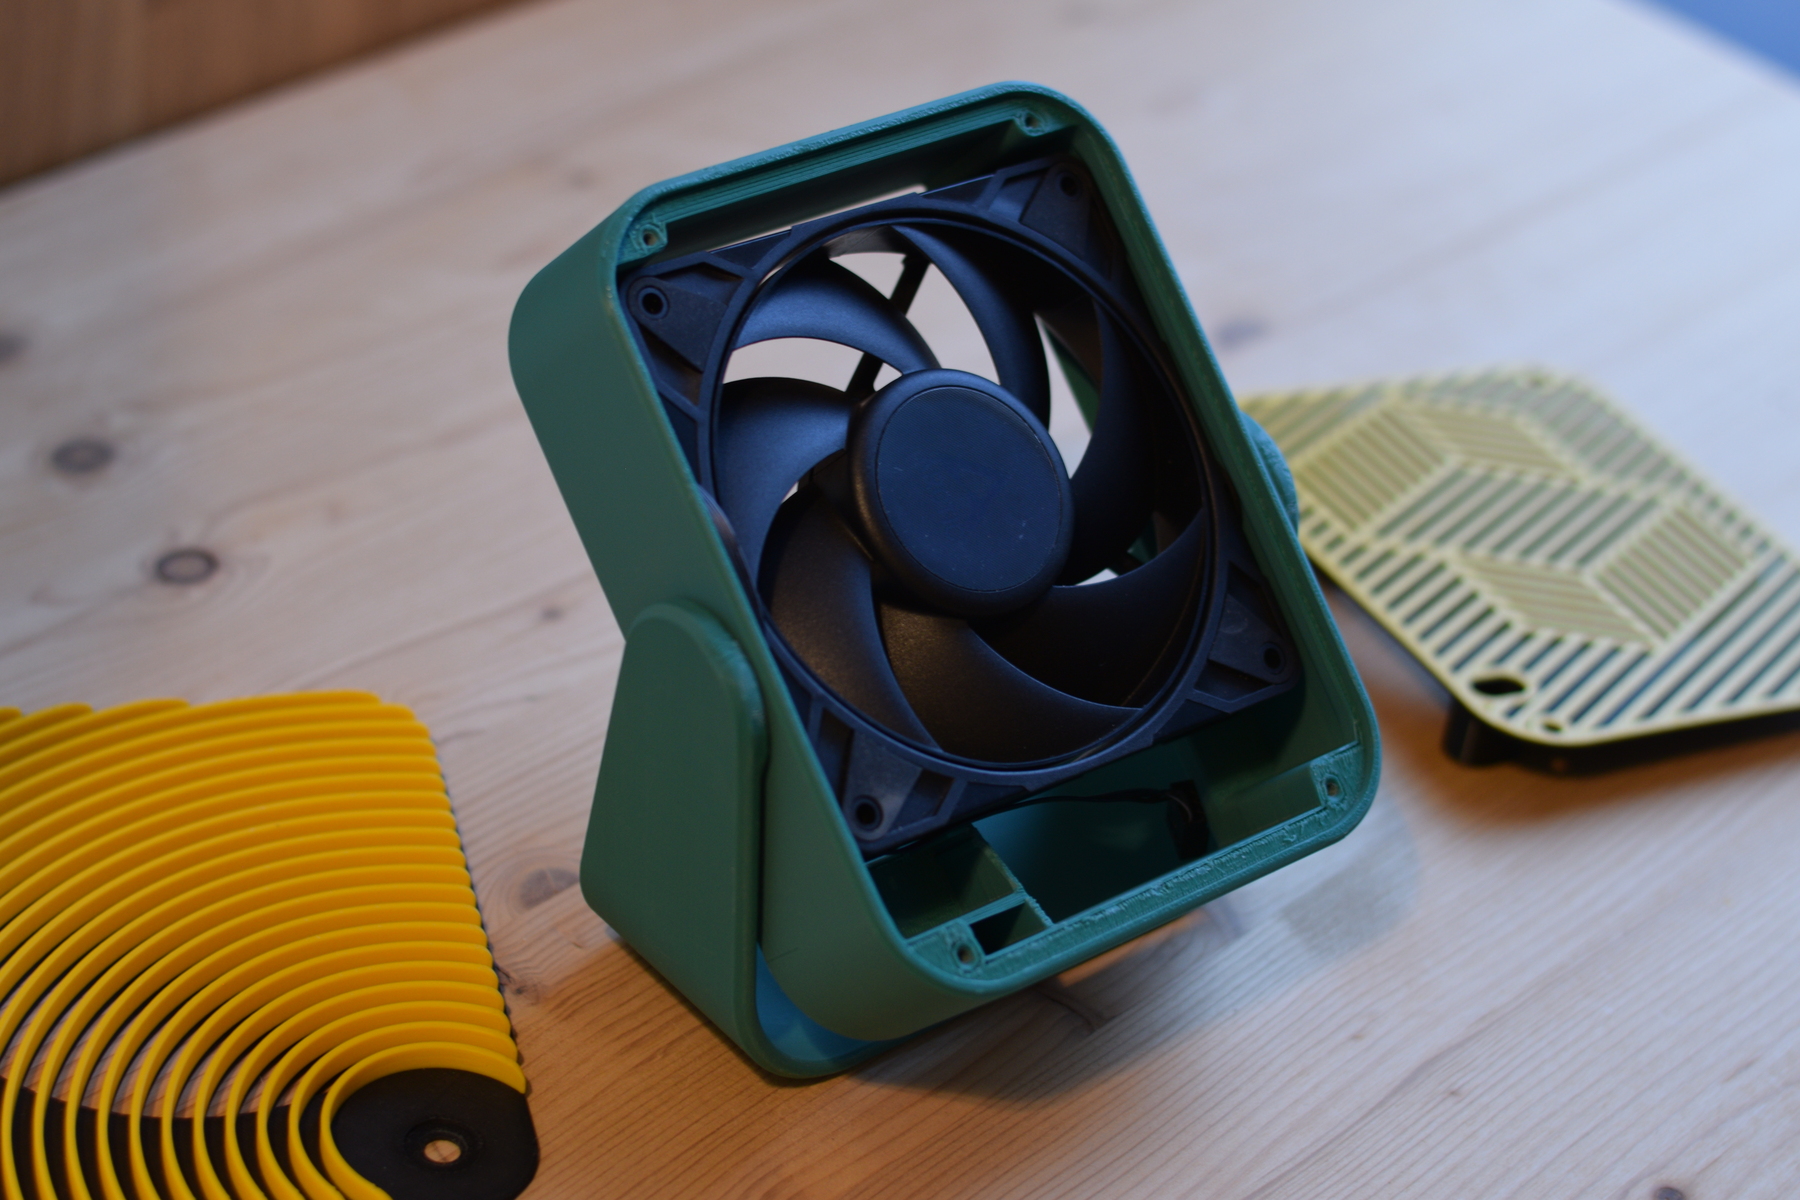
Any 120 × 25 mm fan with a 4-pin PWM connector will fit the model and work with the controller. The housing is sized for the 25 mm depth, so slim 15 mm fans and 140 mm fans are out. Beyond that, the housing doesn't care whether you splurge on a Noctua or use whatever's left over from your last PC build.
Choosing the controller
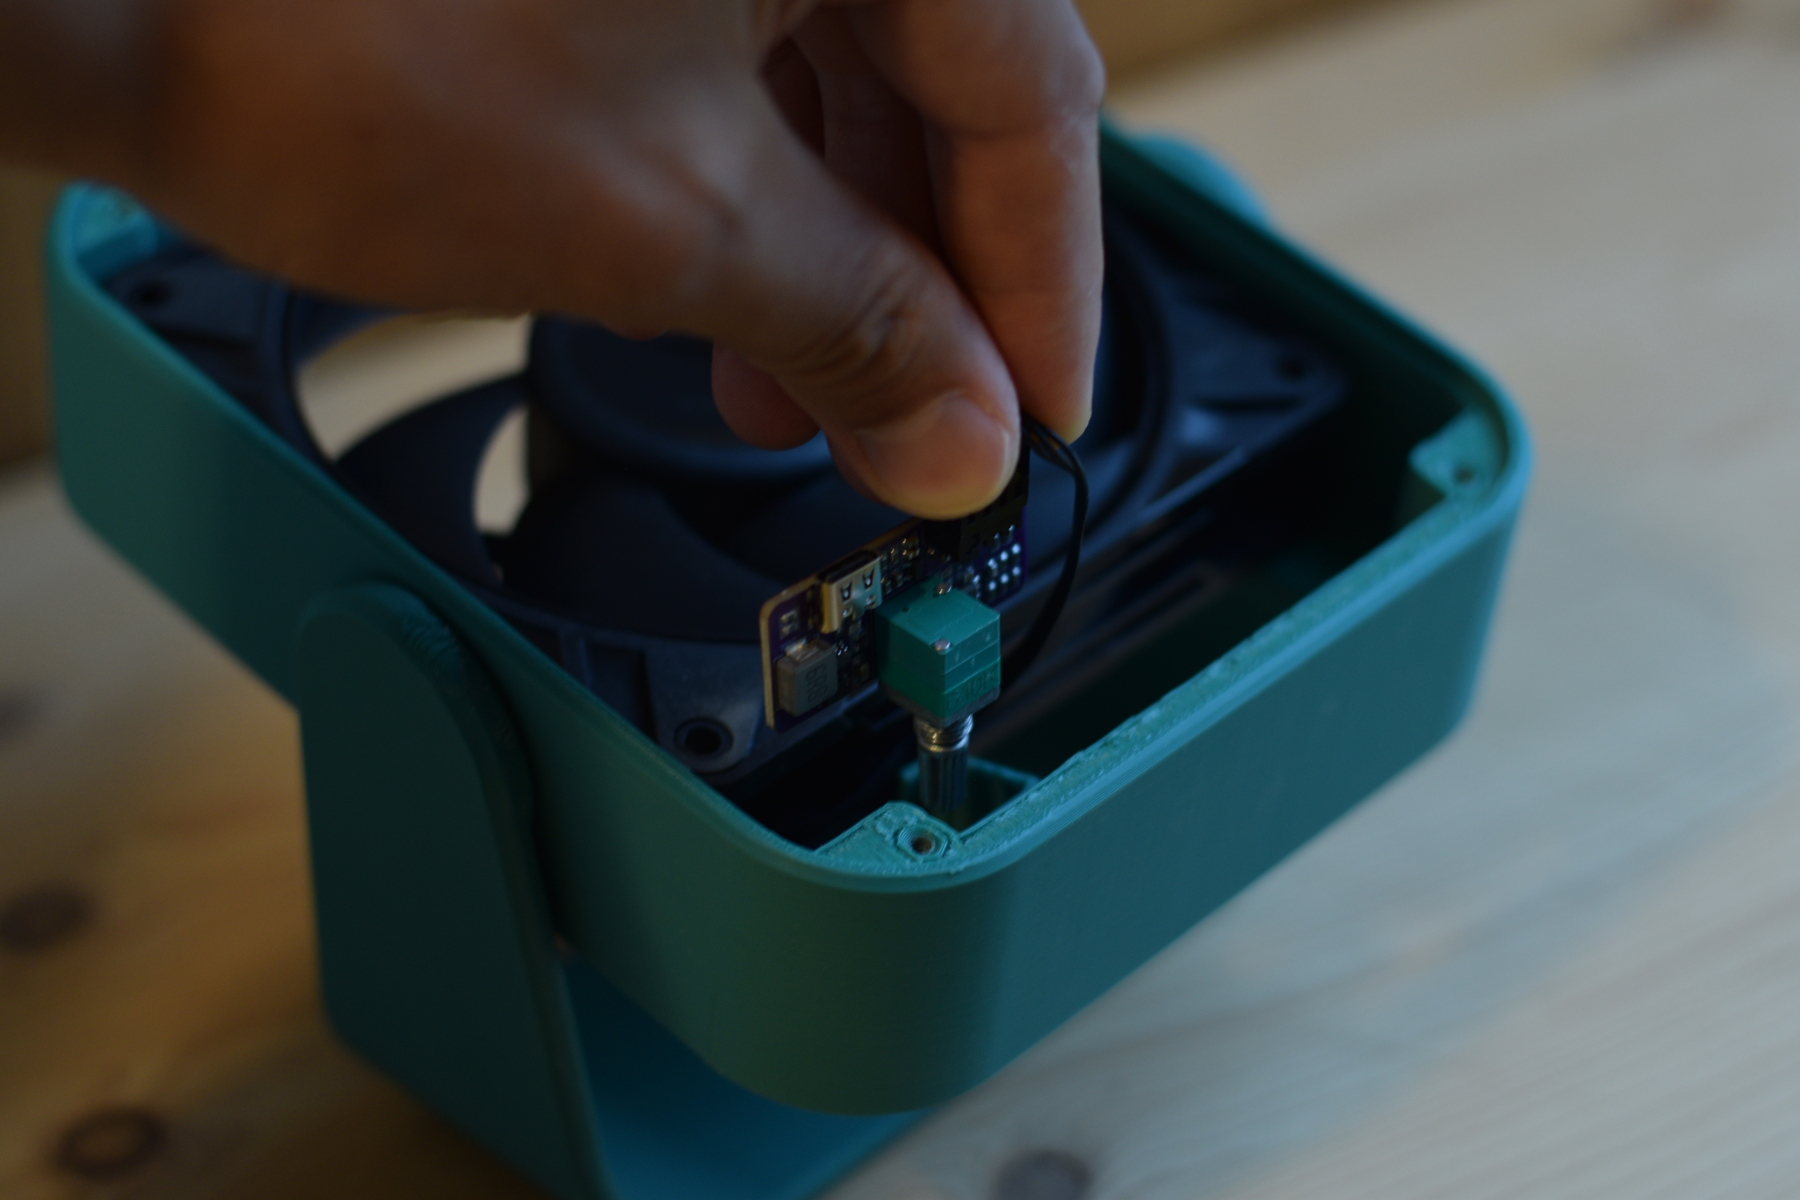
The board is a generic USB-C PWM fan controller with a rotary potentiometer for speed. These boards come in several layouts, and the model is designed around the B-type variant with the rear-facing USB-C port. That orientation matters: the board slides in from the back of the housing, the USB-C port exits through the back cover, and the potentiometer shaft passes through the front, where it's secured with the thin nut that comes with the board.
Assembly
Nine steps, one screwdriver.
- Seat the ribbed cylinders. Press the ribbed hinge cylinders into their seats in the main body.
- Load the hinge springs. Insert the printed springs into their pockets in the leg.
- Close the hinge. Bring the leg and body together, insert the endcaps from the inside, and lock the hinge with two M3 × 10 screws.
- Insert the fan. Drop the fan into the main body with its back side, the side with the motor struts and label, facing forward. PC fans push air out through the strut side, so this is what sends the airflow toward you instead of at the wall.
- Screw the fan down. Use the four screws that came with the fan.
- Snap on the front cover. Line it up with the slots on the front of the body and press until it clicks.
- Fit the controller. Slide the board in from the back, pass the potentiometer shaft through the front, and secure it with the thin nut. Plug the fan's 4-pin connector into the board.
- Press on the knob. It's a friction fit. Push it onto the shaft until it bottoms out.
- Close the back. Fit the back cover and secure it with the remaining four M3 × 10 screws.
Plug in a USB-C cable, turn the knob, tilt it where you want it.
Printing notes
General Print Settings
- Material: PLA (3 different colors)
- Layer Height: 0.2 mm (Standard/Generic settings)
- Hardware: Bambu Lab P1S (or similar)
- Total Print Time: ~10 hours
- Supports: Minimal
Part Orientation & Support
- Main Frame & Leg: Print laying on their back sides. Supports are required for the best results.
- Hinge Parts & Knob: Print flat. No supports required.
Two-Tone Printing Instructions
- Front Cover: Print laying on its flat side. To get the two-tone look (e.g., black base with yellow lines), add a pause command in your slicer right after the flat section finishes. Manually change the filament—or configure an automatic color change if your printer has an AMS/filament system—then resume the print.
- Rear Cover: Print laying on its back side, starting with the color you want for the mesh. Add a pause command just before the printer starts laying down the solid layers that cover the gaps between the mesh lines. Swap your filament and resume. No supports are needed, as most printers can easily bridge the gaps between the lines.
FAQ
Can I use any 120 mm fan?
Yes. Any 120 × 25 mm fan with a 4-pin PWM connector fits the model and works with the controller. A 3-pin fan will physically fit but may run at full speed only, since it has no PWM input.
How is the fan powered?
Over USB-C, through the controller board. One cable handles power, and speed is set on the knob.
How loud is it?
That depends on the fan and the speed you dial in. With the Arctic P12 Pro LN at low speed, it's quiet enough to forget it's running.
Is the desk fan parametric like the laptop stand?
No. The laptop stand is driven by screen size; the desk fan is a fixed design built around the 120 mm fan standard, so there's nothing to adjust. Print it, build it, use it.
Do I need to solder anything?
No. The fan plugs into the board's 4-pin header, and the board powers everything from USB-C.
Download and build
The desk fan is free to download on Printables. If you print one, tag it #BuiltInShapr3D so we can see it.
The model was designed entirely in Shapr3D. Download it for free and build your own.