


Rapid prototyping is a process of building parts by adding layers of material that has existed since the 1980s. In more recent decades the methods used have expanded rapidly due to developments in CAD, inexpensive robotics, and materials.
What is Rapid prototyping?
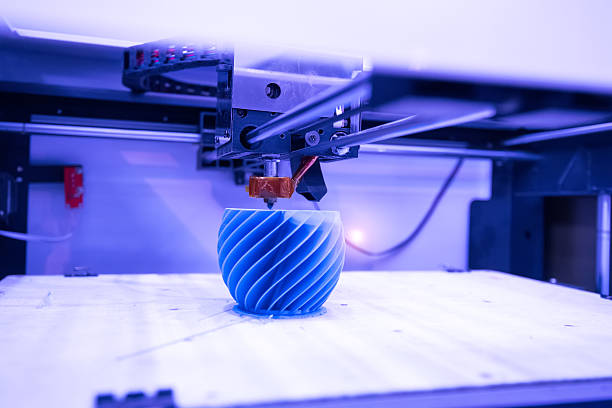
Rapid prototyping comprises a set of processes that progressively build parts by laying down thin layers of material. The material can be fused in a number of ways, including powder or liquid fused by UV light or laser, melted plastic filament extruded in layers like toothpaste, or sprayed like ink from an inkjet printer. The materials used can also vary widely from soft elastomers, semi-rigid plastics to resin infused with fibers or powdered metal.
The attraction of rapid prototype processes is that you can make just about anything without making expensive and long lead time specialized tooling. For example, you can make plastic parts without making injection molding tooling first. This is an obvious save of time and money. Plus,
you can make the rapid prototype parts directly from CAD data without the need for specialized CNC software and machining experience.
Because you can skip steps in the usual manufacturing processes and produce a low number of parts quickly, and product development teams could create multiple iterations more quickly, these processes at first were used almost exclusively as prototyping processes. The name Rapid prototyping stuck for a couple of decades until more sophisticated materials, machines and processes were developed which enabled these parts to be used for more than just prototyping.
The term 3D print has actually stuck for a long time, even though it originated from the ink jet connection between 2D printers and some models of 3D printers. It is a catchy name but it doesn’t really represent the genre as a whole.
Over time, it became more obvious that the notion that the processes all had in common was that they built parts by adding material rather than cutting away material. Gradually, these processes have become known to the industry under the more broad header of Additive processes.
The materials are usually a plastic blend, but they can take on a number of properties. You can also get more exotic and expensive materials such as metallic blends, fibrous materials such as glass, carbon, and wood products. There have also been developments in printing food materials for decorative shapes, concrete for large scale construction, and biological materials for organ replacement.
Traditional manufacturing methods impose limitations on your products.
Sometimes these limitations are based on easily fabricated shapes, such as I-beams, sheet metal, or wire. Sometimes you are limited to shapes that can be molded inexpensively due to limitations in mold tooling. Additive processes remove many of these limitations and allow you to design without worrying so much about the limitations of traditional manufacturing methods.
From CAD to your hand
The purpose of these processes is usually to easily and inexpensively create a physical part from CAD data that can be held in the hand and viewed. This is a huge benefit in product development. People who don’t spend all day on CAD software often have some difficulty making the leap in their imaginations from an image on the screen to what that part or product would look like in the real world.
More than the visual properties is sometimes the tactile - how it feels in the hand, if the size and scale and weight are correct, and so on. The prototypes can be finished by sanding and paint, then photographed for marketing purposes or used to create a functional model to demonstrate how a mechanism would work or how it would fit or feel in the hand of the user.
CAD software usually produces *.STL files or a similar format (3MF, OBJ, AMF, PLY, X3D, FBX) for 3D printing. These files are essentially a cloud of points that represent the outer surface of the part. It can also contain color information and 3D print specific data.
CAD data is mathematically precise - using mathematical formulas for curved surfaces, but this makes the files large. Breaking surfaces into points simplifies the data. Plus, to 3D print the data, that much accuracy is not needed because the process itself is not as precise as the data. For 3D printing, points are joined in groups of 3 to make many small triangles.
This forms the outer skin of printed parts in very small flat surfaces. If the points are close enough together, the finished part will feel substantially flat or round like the original CAD data, but if the STL data is too coarse, you will notice flat spots and edges on what should be curved surfaces.
Who can use Rapid prototyping
Rapid prototyping and related processes were originally meant for engineers, designers, and managers to visualize work-in-progress designs. As the industry developed, more roles have been included in the range of people that can use these techniques.
Now Rapid prototyping processes are used by home repairmen, DIYers, people who need specialized tools, International Space Station astronauts, collectors and sculptors making figurines or scale models, pattern makers for molding or casting, aeronautical engineers, and more.
3D printed parts can be found on saleable low-volume products, like high-end drones, model aircraft, commercial aircraft, and so on.
If your product has a complex requirement for traditional manufacturing, chances are it could benefit from an Additive process.
Materials, processes, and machines
Materials, processes, and machines go hand in hand. Much of the new development in Additive processes has come from low-cost precision robotic controls. This has led to low-cost, purpose-built 3-axis machines to position a nozzle, print head, or laser. The low_cost components have even led to many kits and do-it-yourself builds.
More sophisticated machinery is required to make larger or more accurate models, or enclosures to prevent gasses from escaping out of the machine into what is often an office work area.
Materials
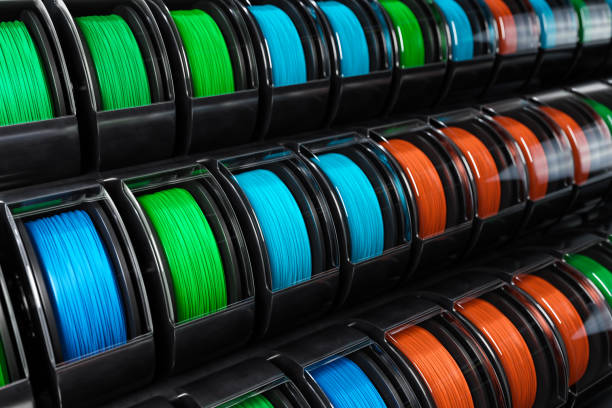
Common material types used are filament, plastic powder, liquid polymer, metal powder, metal wire and paper, plastic or metal sheet. Some machines have multiple nozzles and can print multiple materials, or even colors in a single print. There are other composite options with some fillers to add strength.
When selecting materials, there is almost always a set of trade-offs that you must weigh against one another. For example, very strong materials can also be brittle. Materials that are easy to print may not hold up to mechanical forces. It is best to work with a supplier who knows the machines and materials to select processes for each part.
Filament materials
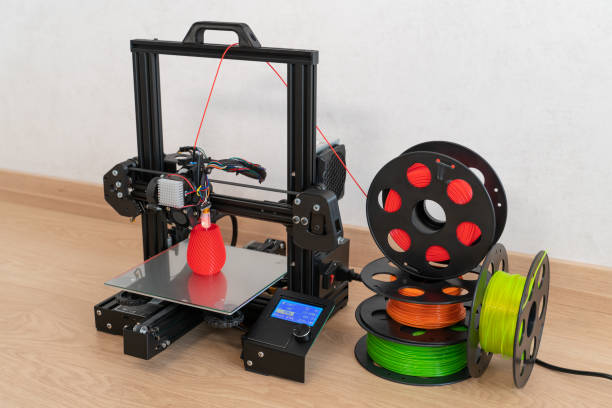
Filaments are available in ABS, PETG, Nylon and PLA. Filament printing is more popular with home printers because they don’t involve lasers or vats of liquid or powder. There is less cleanup required because there is no extraneous loose material. Because of this, though, filament prints may require support structures for undercuts in the print.
PLA is an easy-to-use material, with low melting temperature. It is often used when a printer is in an office space because it off-gasses less offensive fumes. PLA can also be infused with wood fiber or powder metal to create composites with unique properties.
ABS is a more durable option and more temperature resistant.
PETG materials can be translucent, weather resistant, and sturdy with less shrinkage. PETG is also less complex to use than ABS, but it needs to be kept dry because it absorbs water easily.
PVA is water soluble, so it is often used as a support material in 3D printing, to allow for cleanup in a sink.
PA (nylon) is tough, temperature and impact resistant. The surface can be polished smooth. Nylon may also require a high temperature nozzle to print.
HIPS is a high-impact polystyrene with some rubber mixed in. The material is typically tough but also somewhat flexible. It is relatively similar to ABS, but less brittle.
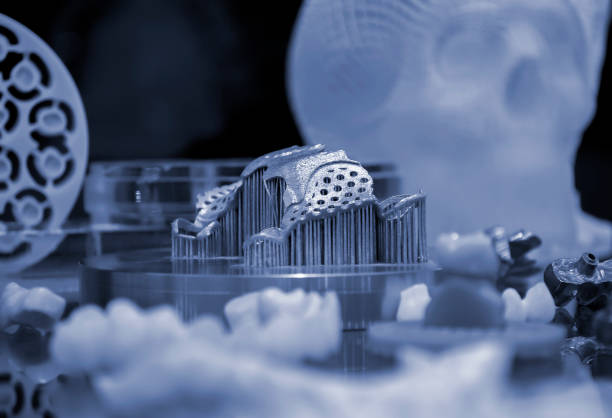
Metal materials, in particular from processes that use powder metal, often require additional processes to bake out the binder and to sinter the piece. This often results in shrinkage, so you should be able to plan for scaling up your CAD model for powder metal printing.
Concrete is one of those specialty materials you might have seen used by large scale robots that extrude concrete in layers to build simple buildings. This technology is available, but it may not exist at scale such that it is easy to acquire. Machines that lay concrete blocks also exist, although they may be only experimental.
Foodstuffs are also a printable material. 3D printers are simply the combination of an X-Y platen robot combined with a Z axis stepper with a simple extruder attached. This means that any extrudable material is a potential 3D printing material. Cookie dough, frosting, uncooked sausage, hummus, and so on. Decorating cakes can now be done via program, and repeatedly. It remains to be seen if applications like this are actually practical or economical. But there is no question they are possible.
Resin or wax materials
Rapid resin cures quickly and shrinks less. It's good for dimensional precision.
Tough resin is similar to ABS.
Water washable resins do not have to be washed in alcohol, so the cleanup process is simplified.
Flexible resins include TPU or Flex and are used when you need parts with some flexibility.
Plant-based resins make the process somewhat more Earth-friendly, less toxic, and easier to clean up.
Castable resins are used to make patterns for lost wax casting.
Glow-in-the-dark resins are one of the advantages of vat printing over using filament FDM methods. The resins can include glow in the dark materials more easily.
Processes
The names of processes used for building parts can be technical and confusing, but understanding them is important because each process requires a different type of machine. So whether you are buying a machine to print your own parts or hiring a service to build parts for you, you need to understand the capabilities of each procedure and each machine for parameters such as tolerance, surface finish, color, mechanical properties, build size, cleanup requirements, and others.
Vat photopolymerization - UV light cures thin layers of liquid resin from a vat into solid. This includes processes such as SLA (stereolithography), DLP (digital light processing) and CLIP (continuous liquid interface production).
Material/binder jetting - A plastic material and a binder agent are sprayed to create a layer, like inkjet printing on paper. MJF (multi-jet fusion) can also be used to create parts with multiple materials or multiple colors.
Powder fusion - A laser fuses a layer of powder into a solid. SLS (selective laser sintering) spreads a layer of powdered plastic and traces a laser around the perimeter of the part to melt the powder into the rest of the workpiece. When the part is finished, it is embedded in excess powder. This excess powder acts as a support for undercut material. If you create hollow parts with this method, you need to provide a hole in the part for the excess powder to escape.
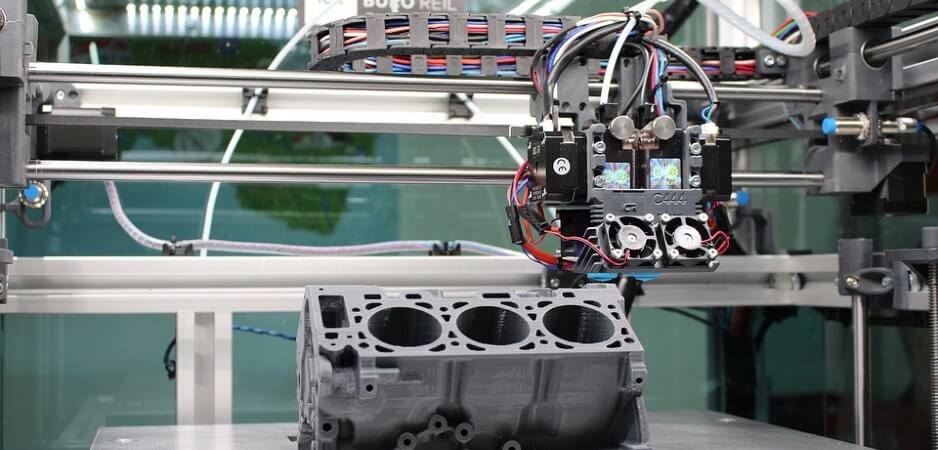
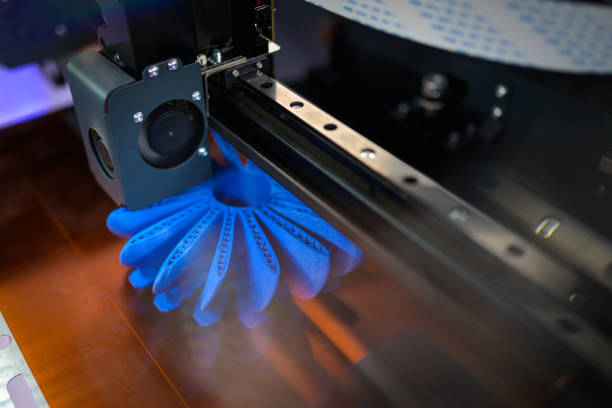
Extrusion - Thin plastic filament is melted and extruded to create shapes in layers. This can include processes such as FDM (fused deposition modeling), FFF (fused filament fabrication), DIW (direct ink writing), EAM and EAC (extrusion addition of metals/ceramics).
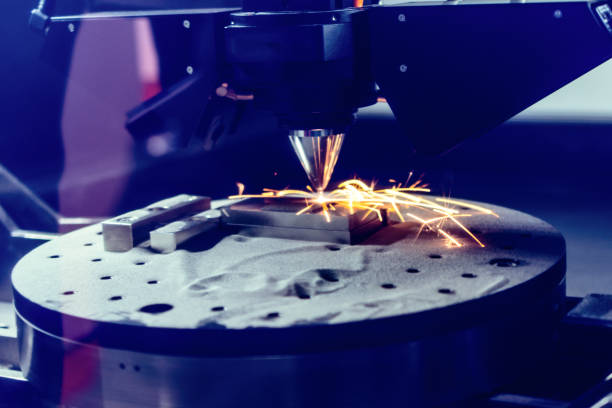
Directed energy deposition - Powder metal is deposited at the focus of a laser to fuse into solid material.
Lamination - Thin sheets of paper, plastic or metal can be cut and laminated to create a finished part.
Electron beam fabrication - Metallic wire is melted and deposited onto a substrate in a vacuum.
These simplified descriptions give you an idea of the technical requirements for the machinery to perform the process, and indirectly an index of cost estimation.
Beyond prototyping
Prototypes are test products made for visualization and design verification that usually don’t use the final manufacturing process. Prototypes are made directly from CAD data, even if the design isn’t perfectly finished yet.
Very often, the processes used for creating these prototypes are so convenient and cost effective, that they can be used for other purposes, including making patterns for molds or for actual manufacturing.
Manufacturing
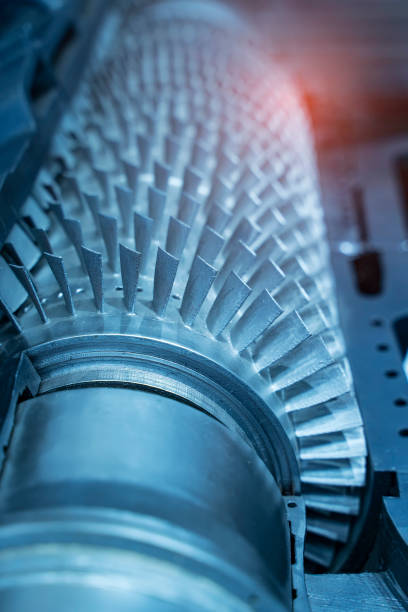
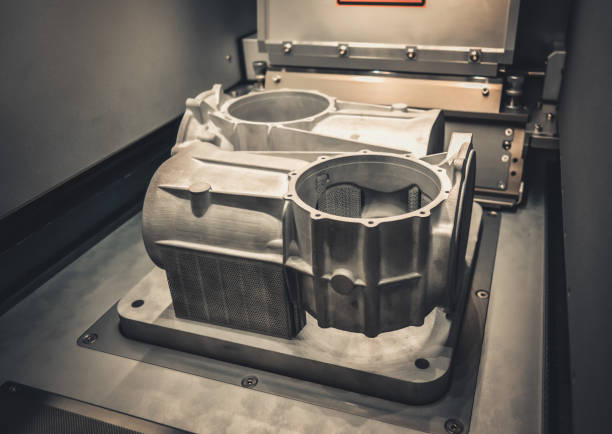
Some types of products are very difficult to make through processes other than Additive processes. For example, fan blades in a jet turbine can be manufactured directly by Additive processes using special metal blends. Making these parts on a CNC mill (subtractive) takes a long time to get the required surface finish on the blades.
Casting is another method that can be used to make these parts, but casts require patterns and to get the needed surface finish can take a long time to build up the molds. Plus, this process requires a lot of ancillary equipment to melt and pour the material into the molds, cool the molds, and clear the molds from the parts.
Meta-manufacturing
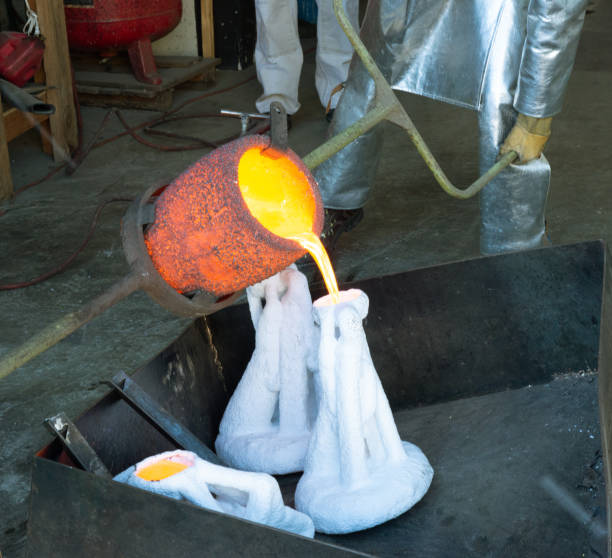
Additive processes can be used for purposes that aren’t prototyping and aren’t directly manufacturing components for sale. There is an intermediate step where parts are needed to be used as sacrificial patterns to create molds. In this process, parts are scaled up slightly to represent the rate of shrinkage of molten metal. These scaled up parts are then printed in a waxy material that can be melted out of a mold and replaced by molten metal.
The wax parts are dipped in a liquid ceramic material several times to build up layers of material which acts as a mold. The molds are fired in a furnace to harden and also to burn or melt out the wax pattern. Then molten metal can be poured into the ceramic cavities to create parts. The molds are then broken away to reveal the finished parts.
This method creates two levels of sacrificial parts (the pattern and the mold), but generally this process, called lost wax, is used only when other processes cannot create the required shapes. It is expensive, and relatively slow compared to a process like injection molding, but it has the advantages of not requiring large capital tooling, and the ability to make changes quickly without additional cost.
Low-volume processes
Although the name Rapid prototyping has the word rapid right in it, this is considered a low-volume process. A single part can require hours to print. It is only rapid in comparison to parts that might for example take days to produce on a manual Bridgeport mill.
For small parts, you can fit several parts on the platen to be printed at a time, and this might improve efficiency some, but not as much as a process like injection mold, which can produce many more parts per hour. Of course injection mold requires a big machine and a big mold. Lead times on large and complex molds can be many months.
Machine selection
Two primary parameters will drive your machine selection: the size of the parts you want to produce is one of these parameters, and the material and process you want to use will be another parameter. Other parameters can include print speed, step height, clean-up and so on.
Most home desktop printers use either the FDM or FFF process. These use plastic filament on a reel to print parts. These are the least expensive and easiest to set up and maintain. Aside from price, other options you will have to decide between will include factors such as build area size, pre-assembled or DIY, filament size, enclosed or open build area, print head, layer thickness, connection options, support, community, additional features and included software.
You can expect a desktop printer to cost ~$500 to ~$5000, depending on all the factors mentioned above.
Professional or industrial level printers will be much more expensive, and if you are selecting industrial equipment you have some of the same parameters that will likely be important to you, such as platen size, layer speed, surface finish, range of materials available, and so on.
Slicers
If you are buying your own machine, you are going to have to know about slicers. A slicer is a software that takes in the STL, 3MF, or other 3D print data and pre-processes it for actual printing. The slicer creates printing instructions for your printer.
This includes G-code, layer height, head speed, structural support settings, and more. Not all slicers support all printers, so this will become a research project for you. Slicers can range in price from free to several hundred dollars.
Special considerations of Rapid prototyping
While RP is good at a lot of things, it doesn’t work by magic. It still has to print on to something. There is a science to getting the part oriented for printing. It has to start printing on the platen, but then it also cannot just create overhangs or undercuts in thin air. In cases where material would be hanging in the air a support structure must be created underneath it.
When you are printing in a bed of powder, the powder acts as a support structure, but when using filament or inkjet, you must create a lattice to support the overhanging material. This is usually done in the slicer software that prepares the file for printing rather than the CAD software.
Internal volumes in parts can be another tricky situation. If you are making a hollow part with no openings, printing in powder or a vat can be a problem, because you need to get the excess powder out of the cavity. With filament or inkjet printing, there is no difficulty, but it might require some sort of internal lattice structure so the top side can be printed without caving in.
This is part of the beauty of 3D printing because in other manufacturing methods, hollow cavities will force you to make separate parts that must be assembled instead of a single hollow part.
Hollow parts can be printed even when the CAD model is not designed that way. Some slicer software allows for setting a skin thickness or infill percentage. Remember that you need to be practical with material thicknesses. The material has to be able to hold the weight of the part plus any handling or connection forces.
Other non-manufacturable features
Above were mentioned several features that cannot be made easily or cheaply by traditional manufacturing methods. Some additional things that you can accomplish with 3D print that can’t otherwise be done would be to print multiple parts that move as an assembly together at the same time. These parts could be printed in such a way that they would not be assemblable if made as individual parts. This sort of technique is great for demonstrations, and simplified mechanisms.
Printing with multiple materials or colors can be done with overmolding techniques in injection molding, but that doubles the tooling cost and the cycle time for parts.
When designing injection molded parts, you have to consider the direction of pull for ribs and other features, but this doesn’t necessarily help with your design. 3D printing can allow you to create ribbing or hollow sections to stiffen a part mechanically without concern for how the mold is going to open or the part is going to be released from the mold. Unshackling your design process in this way can take a while to undo all of the practiced discipline that took years to develop.
Limitations
While Additive processes simplify a lot of complications in prototyping, manufacturing, and design, they do also introduce some challenges you need to be careful about. These challenges can affect design as well as planning for builds.
Cost and time
You really can’t separate the issues of cost and time in rapid prototyping. The fact that parts are built 0.005” at a time means they are going to take time to build. Depending on part size, you can lay out multiple parts on the platen at once, but you are still making them 0.005” at a time.
If you have secondary finishing operations to make finished parts, it’s going to take even longer. The time issue is really what’s keeping Additive processes from having even bigger success in actual manufacture of mass-produced, saleable goods. It just can’t compete with injection molding or metal die cast.
One advantage in time is that it is relatively easier to go from CAD to 3D print than it is to go from CAD to CNC machined part.
Going from scan data to 3D print is much faster than machining that same data.
As a replacement for injection molded parts, 3D print can compete if the volumes are very low or if the parts are very complex, but this is only because the lead times and costs for mold tooling can be very high.
Surface finish
With most 3D printed parts, good surface finish is going to be a function of secondary operations. Since the printing is a layering process, the finished parts tend to show layers on the inside and outside of the part.
Filling, sanding, polishing and painting are generally part of the process when high-quality surface finishes are required.
Strength
In printed parts, strength is a function of process and materials. Except when you have a metal printed part, then you have to figure in post-processing as well. Printed parts are used in space travel and aircraft with great success, so reliability is definitely possible.
You also need to be careful, especially with lower-end processes, machines, and materials. Not every 3D print process produces plastic parts as good as injection mold, or metal parts as good as CNC machining.
How to get the right data
The right data to print your part will depend on several factors. Obviously the geometry is important. The geometry is generally built in CAD (such as Shapr3D or Solidworks) or a 3D graphics tool (such as Rhino or Zbrush) and then exported to a format discussed earlier in this article.
If your model requires color and you are printing on a multi-color printer, then that information has to be in the data. Not every format supports color. STL will not support color, but OBJ will. You may also need to set up a support structure, or multi-material requirements.
If you are hiring a service to print your data for you, you should always check the data you send to the service. Get a viewer or a slicer to view your printable output. If you are printing yourself, do your research on your slicer and your printer to make sure that whatever CAD output you are getting is correct. Short of damaging your printer, experimentation is always a good thing, and one of the best ways to learn about the limits and capabilities of your process.
Many libraries online offer huge collections of parts already in printable formats, but this does not guarantee that the data in the file is ready for printing. For example, an action figure model may be solid in the STL file, but printing it that way might be expensive and time consuming. This is where you would use a slicer to set up a wall thickness or a support structure.
So good STL data is not necessarily the end of the line, but it is always a good place to start.
In addition to CAD, 3D computer graphics and libraries, another source of data can be 3D scans. Scan data is similar to 3D print data, but has some important differences. 3D scan files are becoming more and more available as scanner proliferation has followed the printer proliferation.
Sometimes scanners are the first step in the process, then the scanned data is manipulated in CAD or CGI software, and then reprinted. You will find this process is used often in reverse engineering.
Summary
Rapid prototyping is known by many names, mainly 3D print and Additive manufacturing. The processes have evolved over the last 40 years to include a wide range of personal to industrial machines, with an equally wide range of materials available for the various machine types and processes.
If you are in the market to get your own machine and make your own parts, you should do a fair bit of research to make sure you understand the machines in your price range and the types of materials each machine can use.
If you intend to use a vendor service to print parts or your company wants to buy a commercial grade printer, there is a wider range of machines, processes and materials available to you, along with a much larger budget requirement.
Additive processes can be used for a range of purposes from simple visual prototypes to functional low-volume saleable products. The data for these prints can come from a variety of sources, including CAD, 3D graphics software, 3D scanning, and online libraries.